I've moved on to a new adventure. You can find me at LisaMcIlvain.com. Please come check me out! Lisa
.
Monday, January 11
Friday, January 17
Dream Kitchen Reveal
Welcome to my Bi-Annual blog post!
Last time I checked in we'd just returned from our Colorado vacation, since then life's been a Texas size roller coaster ride!
In the midst of it all we finally finished our kitchen re-do.
It's been almost a two year odyssey that began with this sink.
Let's go back a few years.
When we moved into our house the kitchen looked like this.
I was especially fond of the powder blue counters.
So here's the story of how we went from this......
Two years ago Santa bought me a farmhouse sink and butcher block counters from Ikea.
Finally I could kiss those baby blue counter tops good-bye.
Because of money & time we did the remodel in stages.
This wasn't Kevin's first Rodeo, he has remodeled and updated the entire house.
then finished it out with bead board and a wide shelf.
I am a very lucky woman to have someone who can take my ideas & make them reality.
They usually turn out even better than I imagined.
The next step was putting up a pretty white subway tile back splash. We went back & forth deciding on grout color and tile pattern but settled on white & bright.
(Can't find a picture of the installation)
My favorite element in the room is this light Kevin made from a piece of old dairy equipment.
I'm not sure what it's original function was but now it's an awesome pendant!
He antiqued the cord with black paint and used the base of an old lamp to mount it to the ceiling.
With 5 people in our family the galley kitchen was cluttered and tight.
I thought by removing the soffits and upper cabinets the kitchen would feel big, light and less cluttered.
It was a little scary going from cabinets to open shelving, after all this is real life, not Pinterest.
This wasn't Kevin's first Rodeo, he has remodeled and updated the entire house.
I waited years to replace the built in oven and cook top with a free standing range.
The cost was not in our budget so we opted for the double oven instead of the confection/oven combo, that saved us around $300. So we sold the old stuff on Craigslist & bought this beauty when it went on sale.
I am so in love with range hoods. I devoted an entire pin board to them!
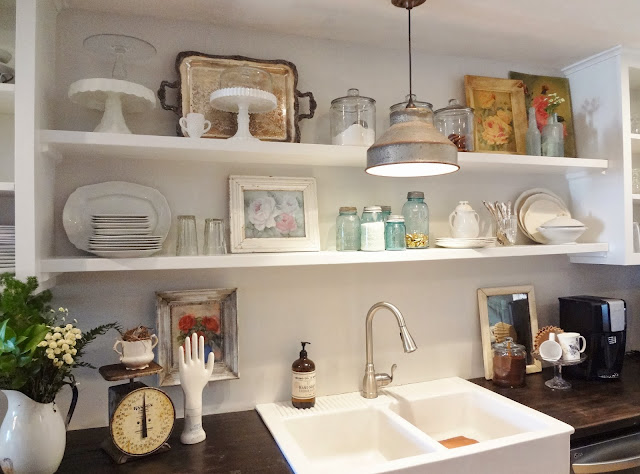
I knew I wanted a nice fat ledge to display my silver trays. Kevin took my wish list and built a beautiful custom range hood.
He's not big on following directions or plans, he just kind of does it his way, but if your interested there are lots of tutorials online.
He started with an el-cheapo hood from Lowes, mounted it over the range,
then finished it out with bead board and a wide shelf.
Open shelving sounded good but when we really started mapping it out we decided to anchor each end with a glass fronted cabinet.
I could store glasses and dishes there & have fun styling the shelves.
Our old cabinets were crap so Kevin built the new ones himself.
They usually turn out even better than I imagined.
The next step was putting up a pretty white subway tile back splash. We went back & forth deciding on grout color and tile pattern but settled on white & bright.
(Can't find a picture of the installation)
My favorite element in the room is this light Kevin made from a piece of old dairy equipment.
I'm not sure what it's original function was but now it's an awesome pendant!
He antiqued the cord with black paint and used the base of an old lamp to mount it to the ceiling.
We had a 35 inch space to fill after removing the double ovens.
My first idea was some kind of industrial cart, but after searching flea markets I realized they were out of our price range. So I did what any good junker would do, I shopped my garage & shed.
This cabinet is exactly 34 inches. Plus the shelves slide out, perfect for pots, pans & even wine!
The best part was the price, free off the curb.
Above that cabinet hangs one of my favorite finds ever.
This beautiful Gothic style cupboard was a display piece at Lonestar Antique Mall. Every time I went I'd check the booth and see if it was for sale. One day I asked the manager if she'd call the vendor and ask if they'd consider selling. It must have been my lucky day because they said yes!
It just goes to show you, just because it says's NFS ask anyway!
Now it holds my spices.
Coincidentally those pieces matched the wood tone on the old pantry door perfectly. We liked the contrast with the white and metal so the oak Ikea counters were stained dark to match.
Now that the hard work was done I could play!
I pulled all kinds of goodies from around the house and tried different combinations.
I tried some graphic black & white.
Then used my collection of ball jars & rose paintings for a 'romantic' look.
But in the end I decided on what I call a 'French farmhouse' look. I'm neither French, nor have a farmhouse but I like the way it sounds:)
For our eating area I downsized the table to a round $15 garage sale find.
The chairs are from World Market, purchased on sale for $99 each.
The sweet hutch I've had for ages. I painted them all with DIY chalk paint, I found the recipe here.
I made some pleated curtains using this great burlap from HomeFabricsOnline.com & Miss Mustard Seeds easy & free (love her) tutorial.
So there you have it, our 18 month, budget kitchen remodel.
Want to see it again?
Epilogue:
We sold this house & moved over Thanksgiving. Now we're living in our new dream house!
This kitchen remodel 'sold' the house for us.
Some of the pictures from this post (the really good ones) were taken by my wonderful agent.
If you want to see the entire house look here.

Wednesday, July 24
A Mountain Wedding
Hello friends!
We just returned home from a fabulous 2 week trip to Colorado & Wyoming.
First stop on our trip was my cousin Morgan's Colorado mountain wedding.
She met her mountain man Pete in Steamboat Springs where they teach high school, ski and climb mountains.
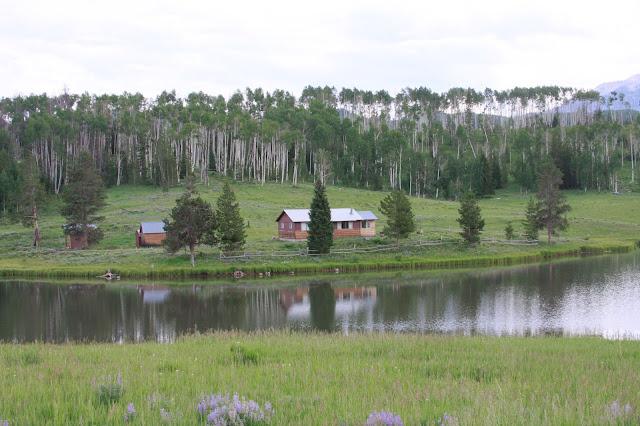
The week long festivities took place at Midnight Ranch, about 30 miles North of Steamboat Springs. The 105 acre ranch has a huge trout pond & 3 cabins. They had BBQs, kayaks, hiking trips & a bunch of other activities planned to keep everyone busy.
It was really a gorgeous place.
The morning of the wedding was spent transforming this enormous tent into Morgan's dream space.
She had spent months planning & designing every wonderful detail.
By 4pm we were hiking up to the ceremony spot.
It was a perfect summer day. Clear skies, 80 degrees and no humidity!
Just like Texas.
Just like Texas.
I was expecting a carriage ride up the hill for the bride, but I about died when I saw a tractor in the distance.
There's more than one way to get up a mountain:)
The ring bearers were adorable in their suspenders and hats.
Then came the junior bridesmaid pulling a goat cart with twin flower girls.

Morgan was a beautiful bride.
She is not a fru fru type of girl and had a hard time finding the right dress.
In the end she settled on a very simple but elegant vintage style gown adorned with pretty French lace.
She is not a fru fru type of girl and had a hard time finding the right dress.
In the end she settled on a very simple but elegant vintage style gown adorned with pretty French lace.
They wrote their own vows and the friend who introduced them years ago officiated.
It was all very sweet and I cried through the whole thing.
It was all very sweet and I cried through the whole thing.
Everything from the cakes to the band were created & contributed by friends & family.
Everyone worked together to bring Morgan & Pete's wedding vision to life.
Somebody call security.
Who let these goons in?
Morgan's principal roasted a pig. It was delicious,
but Philip was thinking it might be a good time to become a vegetarian.
My contributions included a guest book, & the ring bearer pillow.
My gift to the couple, was a vintage wedding book.
My gift to the couple, was a vintage wedding book.
I was in such a hurry to get it finished in time that I forgot to take pictures.
Here are a few from my iphone.
The book is filled with photo's from past family weddings, I left a page blank for their own wedding.
I was inspired by Lori Oles & her wedding book that was featured in Sew last month.
The picture above is my Grandmother & Grandfather.
Unfortunately I have no pictures from their wedding.
The little people on the right are my Great Grandparents.
Howard Stern crashed the wedding.
A row boat carried the new couple to their wedding suite, a tent done up 'Out of Africa' style.
The sun set and the party kicked into high gear.
Next Stop, Grand Lake!

Subscribe to:
Posts (Atom)






.jpg)


.jpg)


.jpg)




.jpeg)


%5B1%5D.jpg)


